Welcome!

When I first had to go gluten free, I did not know where to begin. I tried so many recipes and so many of them were awful. I decided to create a food blog to share my successful gluten free recipes. I am so grateful to all those people that have taken the time to give us good recipes and yummy gluten free products.

Thursday, February 2, 2012

Rainy Days...


Usually, I love rainy days. The days where you turn up the girly music and open up the blinds and enjoy the drizzle on the window panes. But sometimes, rainy days make me feel a little blue. Chocolate strawberries are the perfect answer for those days. My daughter helped me by drying the strawberries. I think more made their way into her mouth than into the chocolate.

1 cup chocolate chips
1 Tablespoon shortening

Heat for 1 minute in the microwave at 100%. Stir and dip.

I hope that your blue days pass by quickly. We have so much to be thankful for and look forward to.

Wednesday, September 14, 2011

Flourless Chocolate Cake

Ingrid Michaelson has been one of my favorite musicians for quite some time.  My husband was looking through the paper and found this recipe along with an article about her.  I guess this is one of her favorite recipes to make for parties.  This chocolate cake is so much different than any other chocolate cake.  The exterior ends up being kind of crunchy and the interior is like a very fudgy brownie.  This is always a hit when I make it too.  It doesn't end up looking very pretty, which is why I put strawberries on top.

You Will Need:

7 ounces really good semisweet chocolate (45-50% cocoa)
3/4 cup butter
1 cup sugar, divided
4 eggs, separated
Fresh fruit for topping, optional
powdered sugar, optional

1. Preheat oven to 300 degrees.  Melt chocolate and butter in a double boiler.  (I always put mine in the microwave on half power at 30 second intervals...works great!)


2. In a separate bowl, stir together half the sugar and four egg yolks.  Add this to melted chocolate concoction.

3.  Using an electric mixer, beat the egg whites; slowly add remaining 1/2 cup of sugar until stiff peaks form.  (Usually this works great for me, but my electric mixer was broken and they never formed stiff peaks...but hey it still turned out just fine!)
4. Fold mixture into chocolate. Pour into greased 9 inch cake pan (which you can remove later) or pie pan if you just want to serve it from the dish.


5. Bake 40 minutes, or until a toothpick inserted in center comes out with just a few wet crumbs on it.  Cool 30 minutes before removing from the pan or topping.  Dust with powdered sugar or top with fresh fruit.


Quinoa With Chicken

I am always looking for good quinoa recipes.  When it's something you eat all the time, you definitely get tired of the cold "summer salad" type quinoa dish.  That is why this one really stuck out to me. This is a one dish meal and it is pleasing to the taste-buds as well as the eyes because of all the colors.  I hope you enjoy it as much as we did.

You Will Need:
1 cup uncooked quinoa
4 tablespoons olive oil, divided
1 1/4 cup chicken stock or water, boiling hot
pinch of salt
1 medium red pepper, diced
1 medium yellow pepper, diced
2 boneless skinless chicken breast halves, sliced into thin strips
1 medium carrot, diced
8 ounces of asparagus or green beans, trimmed
1/2 cup pine nuts, toasted (optional)

Lemon Roasted Garlic Dressing
2 garlic cloves
1/3 cup olive oil, divided
dash of salt
1/3 cup lemon juice
1 tablespoon of honey or more

What to Do:

1. Preheat oven to 350 degrees.
2. Soak quinoa for one minute in cool water, stirring to loosen any dirt particles.  Pour into strainer and rinse.  Place in a small baking dish.  (I used a 8x8 inch baking dish and this ended up being kind of crowded. I recommend something a little bigger.)
3.  Bake quinoa in preheated oven for about 8 minutes.  Stir in 1 tablespoon of olive oil and bake an additional minute.  (I had never thought of doing this before, but it gives the quinoa a really nice texture.)
4. Carefully add chicken stock or water and salt to quinoa, stirring to blend.  Cover with foil and bake for 20 minutes.  (Be careful when you put it in the oven not to slosh the dish because then you'll get quinoa all over the bottom of your oven, oops.)
5.  Heat remaining olive oil in a pan and saute chopped pepper and chicken strips.  Set aside.
6.  While that is sauteing begin making Lemon Roasted Garlic Dressing.  Place garlic cloves in a foil pouch.  Drizzle with a little olive oil and salt.  Bake in 400 degree oven for 15 minutes.  (Instead of doing this I used store bought minced garlic and skipped the whole roasting step.)  Place roasted garlic in a blender.  Add lemon juice and honey and process until smooth.  With blender running, slowly pour in remaining olive oil until dressing emulsifies.
7. Steam carrots and asparagus or green beans for 1-2 minutes until brightly colored and slightly tender.  Drain and submerge immediately in cold water for 30 seconds.
8.  When quinoa is done, remove baking dish from oven.  Add pepper, chicken, carrots, and green beans/asparagus, stirring gently to combine.  Drizzle with Lemon Roasted Garlic Dressing and serve.

Sunday, August 14, 2011

Tilapia Po'Boys


I always crave southern food in the summertime.  I don't know if it's the warm weather or maybe if it's just here because I'm almost living in the south, but this sounded so delicious.  And it was!  I used the buns from the previous post for this recipe.  I am so happy to be baking and blogging again.  

What you will need:
Cajun Mayo:
1/2 cup mayonnaise
1 teaspoon cajun seasoning*

*I didn't measure any of the seasonings.  I tossed in some chili powder, white pepper, cayenne pepper, black pepper, thyme, garlic salt, and even allspice which tasted yummy.  The point is, put in whatever you want.  

Sandwiches:
1/2 cup cornmeal
1/3 cup GF flour (for this I used King Arthur Gluten Free Multi-purpose Flour) 
1 teaspoon salt
1 teaspoon Cajun seasoning
1/4 teaspoon Seafood seasoning
2/3 cup buttermilk
4 tilapia fillets
Vegetable oil for deep fat frying
4 buns

What to do:
Step one: In a small bowl combine the mayo ingredients and set aside.
Step two: In a shallow bowl (I used a pie pan), combine the cornmeal, flour, salt, and seasonings.  Place buttermilk in another shallow bowl.  Dip fish in buttermilk, then coat with cornmeal mixture.  

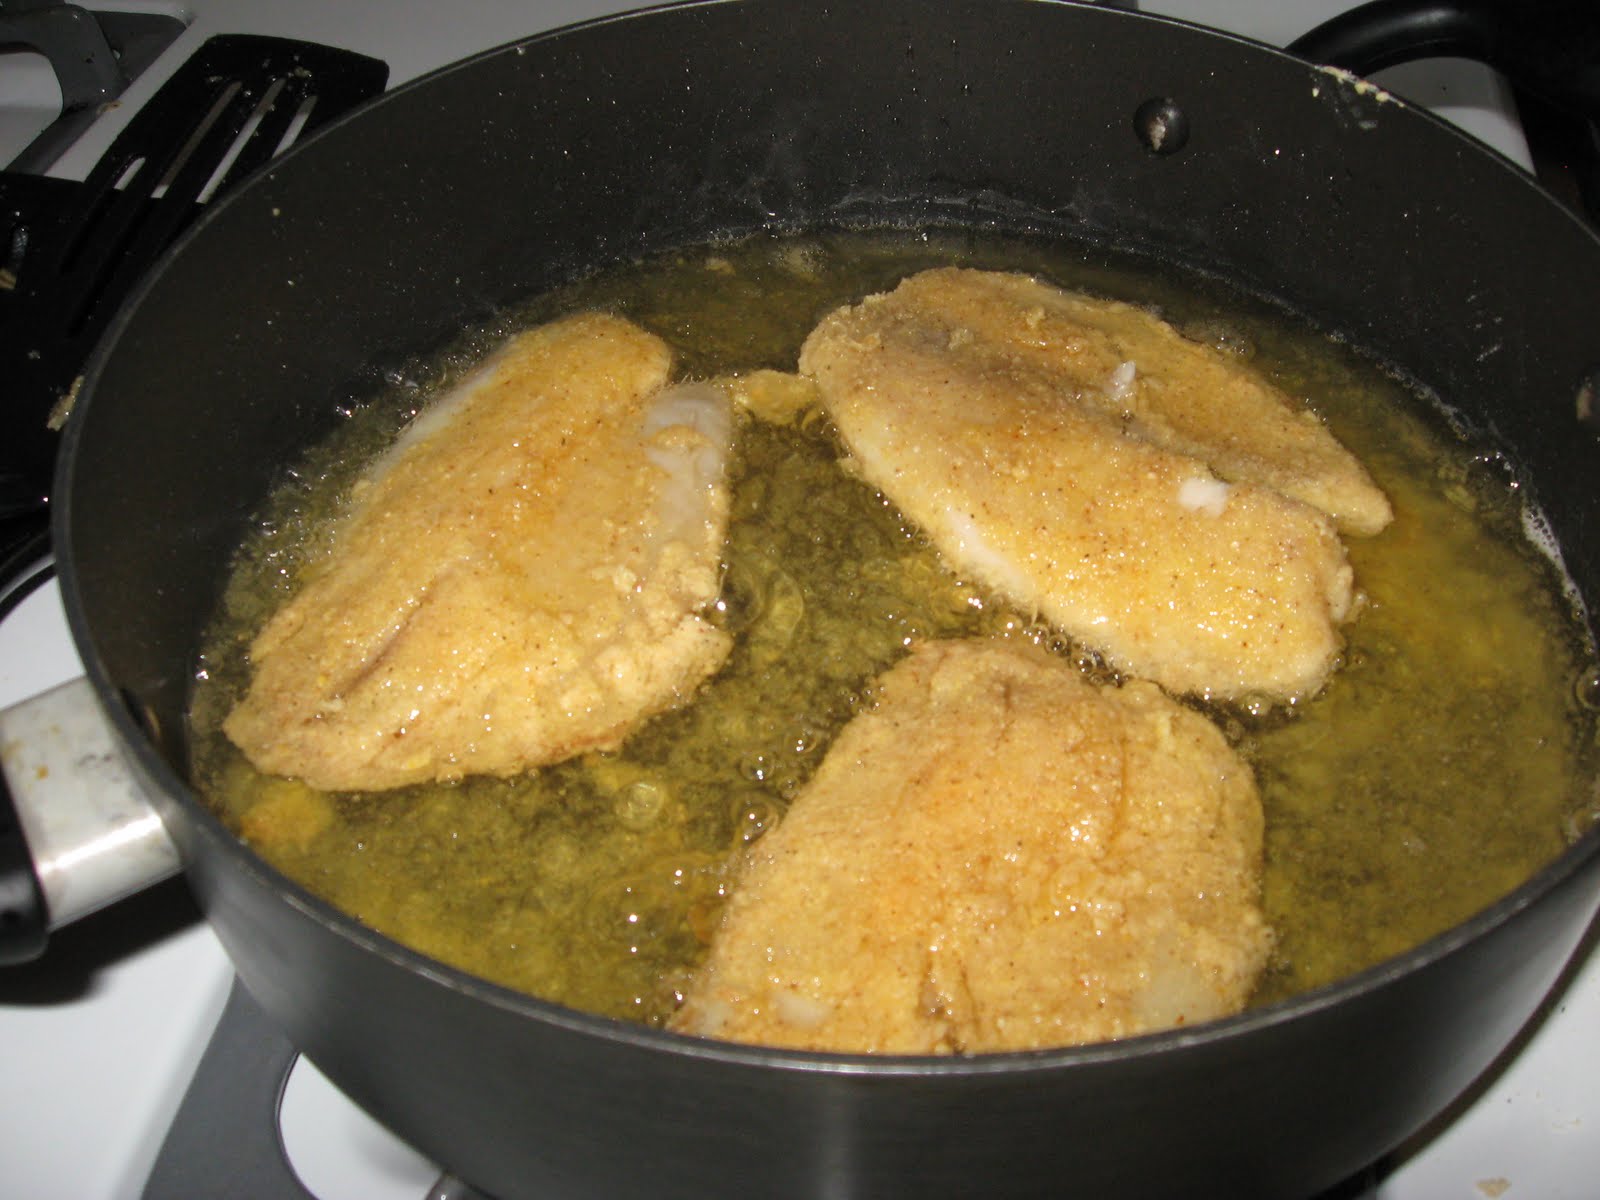
Step Three: In a skillet, heat 1/4 inch of oil.  (To know when it is hot enough the oil needs to be even more "fluid" than when you put it in.  Flick a little bit of water into the oil and if it sizzles it's ready.  If the sizzle made you jump...it's too hot.) Cook fillets for 2-3 minutes on each side or until fish flakes easily with a fork. Drain on paper towels.
Step Four: Place mayo mixture on bun bottoms and put fish on top of that.  Add in whatever toppings you desire.  I chose avocado, tomato, and lettuce.  
Step Five: Enjoy!

Buns!!!

 Success at last!  I was determined to find a recipe for hamburger buns and I recently received my August/September issue of Living Without.  I have thoroughly enjoyed being subscribed to this magazine and all of their recipes are delicious!  With a few slight changes to one of the recipes I was able to make hamburger buns!  I used these as buns for dinner that night and buns for breakfast the next morning. Scrumptious!  I hope that you enjoy them as much as I did.

What you will need:
2 cups rice flour (possibly more)*
1 cup cornstarch (possibly more)
1 cup tapioca flour/starch (possibly more)
3 teaspoons xanthan/guar gum
1/2 teaspoon cream of tartar
1/2 teaspoon salt
3 teaspoons active dry yeast
1/2 cup vegetable oil
2 tablespoons honey
1 extra large egg + 1 extra large egg white **
2 cups warm milk (any milk will work)

*I say possibly more because it depends on the altitude you are baking at, the humidity, and the consistency of the dough.  Add more if it needs it, don't add more if it doesn't.  :)
** I don't buy extra large eggs.  I used a large egg and a large egg white.  I didn't seem to need more, but if yours does, put a tablespoon of mushed up banana in.  It will be enough to act as an egg but not too much to change the taste.

What to do:

Step One: Spray two baking sheets and set aside.
Step Two: In the bowl of a stand mixer with the paddle attachment place the rice flour, cornstarch, tapioca flour/starch, xanthan/guar gum, cream of tartar, and salt.  Mix on low speed until well combined.  Add the yeast and mix again until well combined.
Step Three:  Add the oil, honey, and eggs, and mix until wet ingredients get incorporated into dry mixture.
Step Four:  With the mixer on low, add milk to the mixture in a slow, steady stream.  Once the mixture has started to come together, turn the mixer up to half speed and beat for about 6 minutes.  The dough should be thick and smooth, but tacky to the touch.  If it seems too wet, add more flour by the tablespoon and mix well until you reach the right consistency. It is about here that I realized my dough was not thick and smooth or tacky.  I started adding in tablespoon by tablespoon alternating between my three flours/starches.  2 rice:1starch:1starch.  I ended up adding in the equivalent to about 3/4 cup more flour.  But after doing that the dough was thick, smooth, and no longer "sticky" but tacky.
This is before I added any extra flour.
Step Five: Turn the dough out onto a very lightly floured flat surface.  Pat down the dough into a mound about 1 1/2 inches tall and divide into ten balls.  Roll each ball between wet palms (which worked wonderfully) to make a proper ball.

Step Six:  Divide the balls of dough between the two prepared pans, spacing them evenly.  They will be relatively close together.  Cover the pans with sprayed plastic wrap (spray the "bun side" of the plastic wrap with vegetable oil spray so that it doesn't stick) and place them in a warm spot.  Allow the dough to rise for about 30 minutes or until the rolls are about 1 1/2 times bigger than originally.
Step Seven: While the rolls are rising preheat oven to 375 degrees.
Step Eight: Bake for 13 to 15 minutes or until they are lightly browned.
Step Nine: Enjoy!


Saturday, July 16, 2011

Beautiful Bricks :)

Since moving to the East Coast I have had to rethink the way I bake.  In Utah, I felt that I could bake just about anything I wanted.  I knew the consistency that was needed.  If something didn't turn out right I could fix it.  The humidity and low altitude here make everything so different. 

I have a friend who has had Celiac Disease since she was a baby.  It was her birthday this last week and she had a get together.  She asked me to make gluten free hamburger buns.  I had never made them before and didn't have any trusted recipes for them.  But, I was excited to try something new.  The recipe that I found did not work.  First the batter was too runny and then too grainy.  Finally, when I was kneading it, I had to add in almost another 2 cups of flour to even work with it.  More things went wrong and I ended up with these gorgeous... bricks.  They were so heavy!  So I brought them to the party and we had a good laugh.  Now, I have a bowl of very heavy buns that I plan on using for stuffing this Thanksgiving.  Yay for being resourceful! 

I guess I just wanted to share this frustration with you.  I've been gluten free for 3 years and I thought I was getting the hang of it.  This is my opportunity to learn more.  There's a great analogy to life here I'm sure.  When you feel prideful and you think you can do anything then God sends you a little reminder of how much you rely on him, even for your bread.  What a great opportunity to grow and develop my baking talent.

I hope you are all enjoying your summer.  Remember not to let any heavy buns ruin your day. :)

Monday, July 4, 2011

Monkey Bread

This is it!  The one you've all been waiting for!  Monkey bread.  That warm thought on holiday mornings, full of deliciousness, sugar, and fat.  What more could you want!  Why I chose to make this in the middle of summer is beyond me, but here it is.

As a teenager, I would attend early morning seminary every day before school.  Once a week, one of the students would bring a treat.  I always made monkey bread.  Here is the original recipe that I used (I love it for it's simplicity).

Original recipe

1 package (24 rolls) frozen white bread dough (Rhodes)
1/2 cup melted butter
1 cup brown sugar
1 package regular butterscotch pudding mix
1/4 cup white sugar
1 teaspoon cinnamon
1/2 cup chopped pecans (optional)

Grease Bundt pan, place frozen rolls loosely in pan.  Mix brown sugar and butterscotch pudding mix and sprinkle over rolls.  Mix white sugar, cinnamon, and pecans and sprinkle over rolls.  Melt butter and drizzle over rolls.  Leave uncovered in oven overnight.  In the morning, remove pan from oven.  Preheat at 350 degrees; bake 30-40 minutes.  Let stand in pan 10 minutes before flipping over onto serving plate.

This recipe is so simple because the dough is already made.  I set off to find my own gluten free version.

Gluten Free Version

You will need:
Dough:
9 egg whites
3 tablespoons of oil
3/4 cup milk
1 1/2 cups rice flour
1 1/2 tablespoons baking powder
1 1/2 teaspoons baking soda
3 tablespoons sugar
3/4 teaspoon salt
1 tablespoon and 1 1/4 teaspoons xanthan/guar gum
3 tablespoons apple cider vinegar
3 teaspoons vanilla

Topping: 
1/2 cup melted butter
1 cup brown sugar
1 package regular butterscotch pudding mix (Jello brand specifies that it uses modified cornstarch)
1/4 cup white sugar
1 teaspoon cinnamon (or 2 teaspoons, why not?)
1/2 cup chopped pecans (I used almonds)

Icing:
1 eight ounce package of cream cheese softened
1/4 cup butter softened
2 cups powdered sugar
1 teaspoon vanilla

Step One: Preheat oven to 350 degrees.  Grease a Bundt pan.

Step Two: Beat the egg whites until frothy with whisk attachment on a stand mixer. Add the remaining dough ingredients and stir until thick using the paddle attachment.  (Mine ended up like a thick cake batter/cookie dough mix.  It would be easier to work with if it were a little thicker than that.  If yours ends up runny then add a little more flour until you get the right consistency.) Set aside.

Step Three: Combine the topping ingredients with a fork.

Step Four: Drop rounded tablespoonfuls of the dough into the Bundt pan in layers. (I found here that spraying the spoon once or twice with vegetable spray worked really well.) After the first layer sprinkle a generous amount of topping, do another layer and more topping, and so on.  (I had three layers and more than enough topping)

Step Five: Bake for 30 to 35 minutes until a toothpick comes out clean.  If you can see the bread it will be lightly browned.   Let it cool 10 minutes and then invert onto a platter.


Step Six: In a medium bowl, cream together the cream cheese and butter until creamy.  Mix in the vanilla and gradually stir in the vanilla (more vanilla can't hurt either).  Pour/spread over the top of monkey bread.**Make sure that your cream cheese and butter are softened or else you'll have to do what I did.  Which is melt them in a pan and mix it there, it was inconvenient, but it worked fine. 


Step Seven: Voila!!!  Now you have a delicious dish to share with your friends.  This recipe is easily put in halves or thirds to make a smaller amount.